
For those of you who are just starting to get into the horse world, or are just curious as to what all goes into riding and caring for horses, this is the place for you!
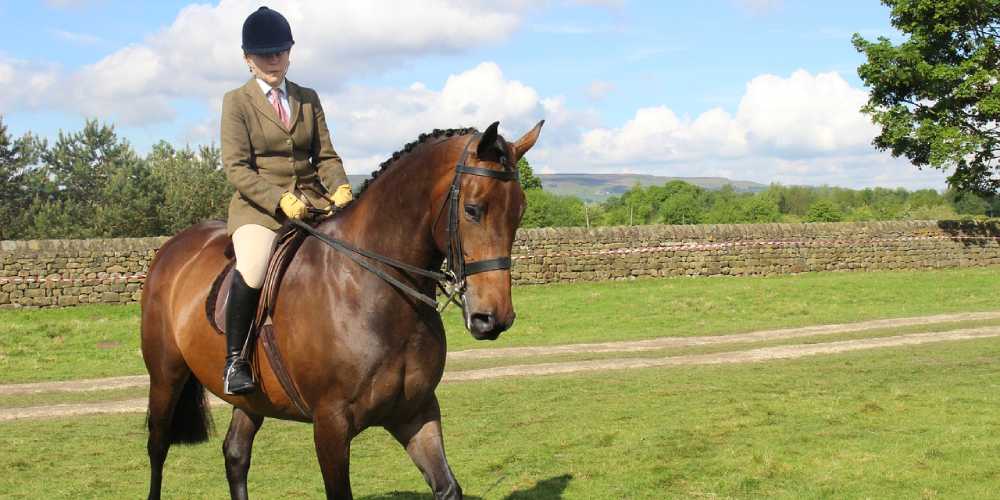
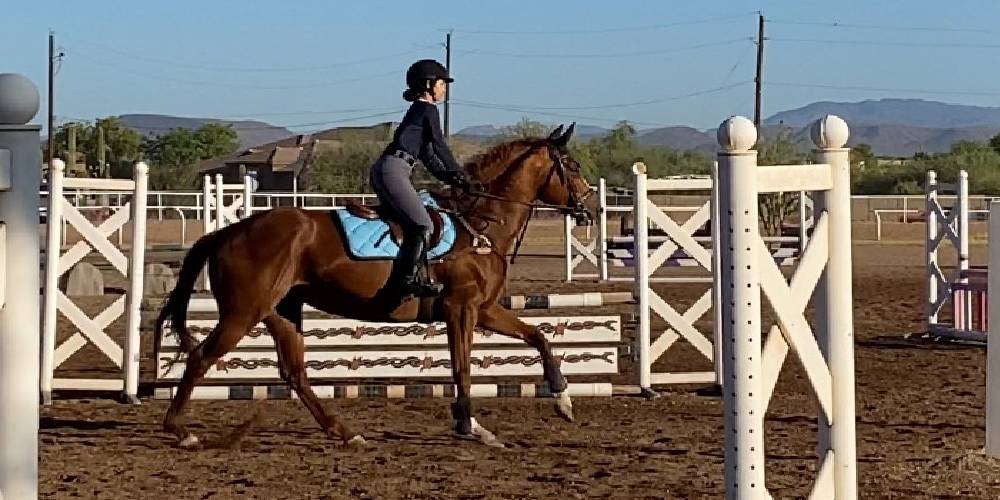
As you may already know, there are two main styles of riding: English and western.
The English riding industry is massive and consists of many different disciplines such as:
- Showjumping
- Dressage
- Cross Country
- Eventing
- Endurance Riding
- Horse Racing
- Hunt Seat on the Flat
- Hunter-Jumpers
- Saddleseat
- Sidesaddle
The Western riding industry is almost as big, though it is more popular in the western parts of the world such as in the United States, Canada, Mexico, and many parts of South America. Some of the many disciplines of riding found in the Western riding industry are:
- Barrel Racing
- Roping
- Pole Bending
- Trail Riding
- Western Pleasure
- Western Dressage
- Working Cow Horse
- Reining
- Cutting
In English riding, the tack is usually made in a smaller, lighter design because the work done in English riding requires a more minimalist saddle. If you were to try to jump a horse in a western saddle, you would get the saddle horn rammed up your rib cage and stomach! And if you tried to rope a cow in an English saddle, you’d have nowhere to dally your rope and you’d likely be yanked clear off your horse!
With this being said, the reason this tack-up-tutorial is specific for English tack, is because the tack belonging to the two styles are just so different that I’ll have to make a completely separate tutorial for western!
Enough said… Let’s learn how to tack up a horse in English tack!
To ensure you are tacking up your horse properly, I will be leading you through a detailed step-by-step process on how to put on each piece of tack, where it goes, and about how tight each buckle and strap should be!
Step 1: Groom Your Horse
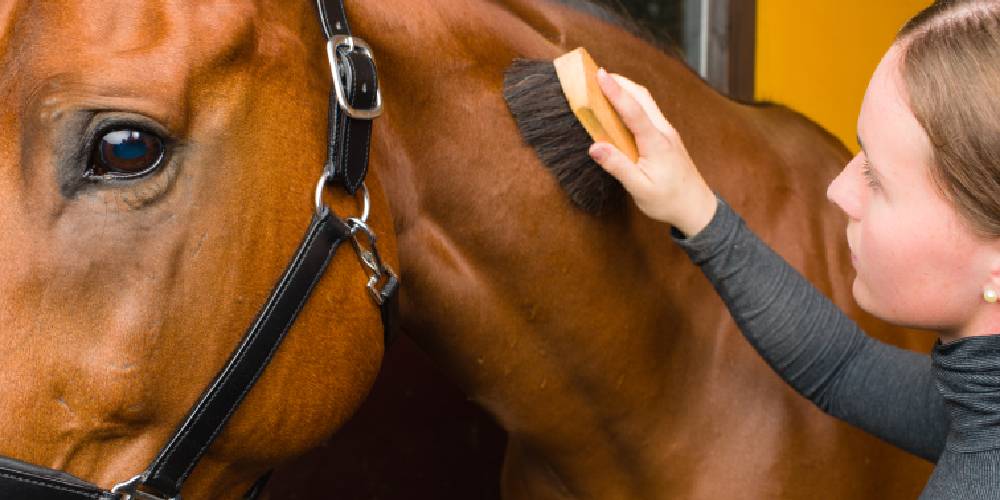
Before you ever start tacking your horse up, make sure you have given them a good cleaning. Grooming your horse is a great way to bond with them. It also is a great way to check to make sure that your horse is physically healthy and unharmed in any way!
Almost every time I have ever found a little bump, scrape, cut, or swelling on my horse has been when grooming them! This is the perfect time to give your horse a whole once-over to make sure they are good to go!
This is the order that I like to use my grooming supplies:
- Curry Comb
- Loosens up any dirt, dried sweat, dust, dead skin, shedding fur, and mud from his coat!
- When using the curry comb, use it in a circular motion over your horse’s entire body
- Body Brush and Laser Sheen
- The body brush brushes off all the nasty things you just loosened up from your horse’s coat and helps to leave his coat smooth, shiny, and clean
- When using the body brush, brush with the grain of the horse’s coat! (if the hairs in the horse’s coat go sideways, brush sideways! If they go down, brush down!)
- I use my Laser Sheen and body brush together to help leave my horse’s coat looking like a million bucks!
- P.S. if you don’t know what Laser Sheen is then you are seriously missing out! It is a shiny-spray that you put on your horse’s coat, mane, and tail. It detangles, repels dust, and leaves your horse looking AMAZING
- PRO TIP: Avoid putting Laser Sheen where your saddle goes! Otherwise it will be more prone to slipping!
- Mane Comb/Brush
- Combs out any tangles your horse may have in his mane, as well as loosens up any shavings or shedding hairs he may have stuck in his mane
- Tail Brush
- Like the mane comb/brush, the tail brush combs out any tangles and removes any shavings your horse may have stuck in his tail
- Hoof Pick
- Arguably the most important part of grooming your horse is cleaning the hooves! Clean out any mud, dirt, hay, rocks, and shavings your horse may have stuck in his feet! This will prevent the onset of yucky fungal infections such as thrush!
- Fly Spray
- Once I finish up with the feet, I spray my horse down with fly spray (if it’s fly season) to keep those annoying flies away from my precious pony
- If your horse doesn’t let you fly spray their face, spray a little in your hand and put it on manually around their nose, ears, eyes, and mouth
Step 2: Put Boots or Polo Wraps on Your Horse
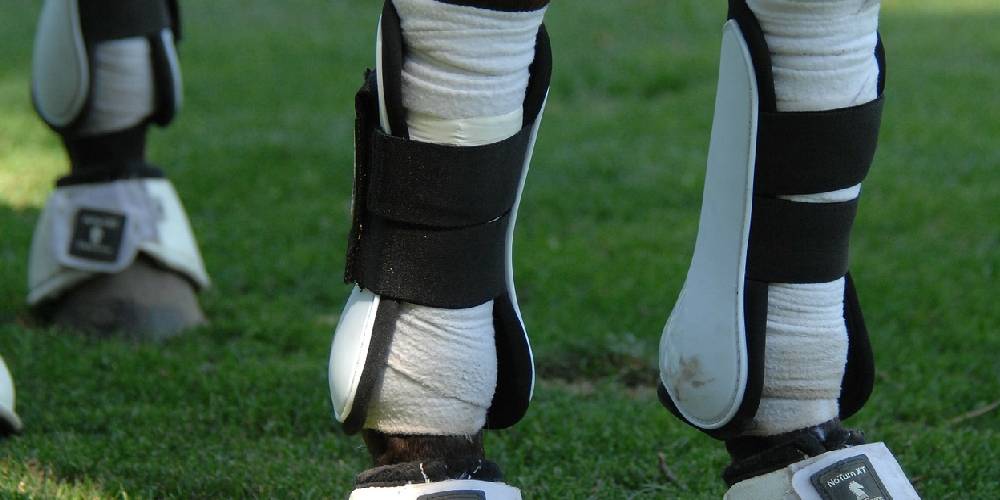
Though boots and/or polo wraps aren’t always needed, I like to use them for all high-intensity training sessions, all jumping sessions, all trail rides, and pretty much every ride on my senior horses to give them that extra support they might need.
If you are just going for a light, easy, low-intensity ride on your horse on flat, even arena ground, you should be able to skip right over this part of the tack-up-tutorial!
However, if you do want to learn how to properly put these on your horse, feel free to explore the links below to learn how to put them on your horse’s legs correctly!
- If you are using a basic pair of Splint Boots on your horse, Click here to see how to properly put splint boots on your horse!
- If you are using Medicine Boots on your horse, Click here to see how to properly put medicine boots on your horse!
- If you are using Polo Wraps on your horse, Click here to see how to properly put polo wraps on your horse!
- If you are using a pair of Tendon Boots on your horse, Click here to see how to properly put tendon boots on your horse!
- If you are using a pair of Bell Boots on your horse, Click here to see how to properly put Bell boots on your horse!
Once you have your boots and/or polo wraps on your horse, it is time to move on to step number three!
Step 3: Put Your Saddle Pad On

Now, it is time to put your saddle pad on!
Saddle pads come in all shapes, sizes, and colors! If you are like me, you never can have enough! It is my dream to have a saddle pad of every color.
Make sure the saddle pad that you have will comfortably fit your horse and your saddle! For example, don’t be putting a pony-sized dressage pad on your 16.2 hand Thoroughbred and hope it fits your horse and your jumping saddle! That just won’t work!
If you have a dressage saddle, make sure you have a dressage pad to go with it! If you have a jumping saddle or all-purpose saddle, make sure you have an all-purpose pad or jumping pad to go with it!
All of my English saddles are either jumping saddles or all-purpose saddles. With that being said, all of my saddle pads are all-purpose pads or jumping pads!
If you are unsure of what saddle you have, or just want to play it safe and get a pad that you know will work for any English saddle you use, just go ahead and buy an all-purpose English saddle pad! These pads will fit most saddles and most horses.
These are a few of my favorite saddle pads and brands to use when looking for all-purpose/general purpose saddle pads:
- Weatherbeeta All-Purpose Pad
- Dover Saddlery All-Purpose Pad
- LeMieux General Purpose Pad
- B Vertigo Dust-Resistant All-Purpose Pad
If you happen to have a dressage saddle and know that you need a dressage saddle pad, here are a few of my favorite saddle pads and brands:
- Weatherbeeta Dressage Pad
- LeMieux Dressage Pad
- Horze Quick-Dry Dressage Pad
- Dover Saddlery Quilted Dressage Pad
When putting on your saddle pad, you don’t want your pad too far forward or too far back. What I usually do is put the front of the saddle pad covering about 60-75% of the withers. This way, I have plenty of cushion in front of, behind, and underneath my saddle (which sits just at the withers).
Step 4: Put Your Half Pad On
Half pads, like boots, are sometimes an optional thing when it comes to light easy riding. If you are riding an older horse, or planning a longer, higher-intensity ride however, a half pad will do wonders when it comes to offering your horse’s back some extra cushion and support.
The half pad that I use on all my horses is a pretty standard one. Linked below are some similar/almost identical to the half pad that I use on a daily basis!
When putting a half pad on, just put it on top of the regular saddle pad. Line the front of the half pad up with the front of your regular saddle pad, and voila! Your half pad is in place!! Now it is time for the saddle!
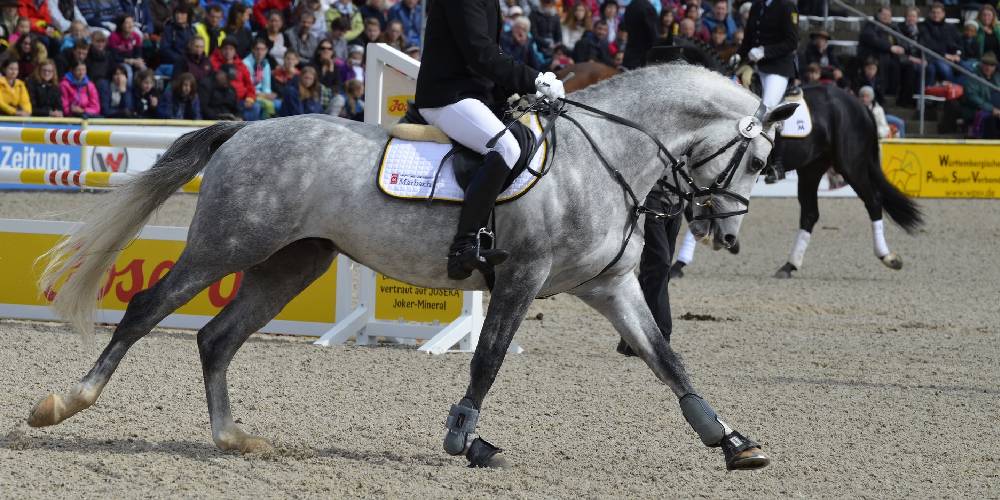
Step 5: Put Your Saddle On
Your saddle is likely the most expensive piece of tack you will own. It is basically a seat for you to sit on that is strapped to your horses back to make riding horses easier and more comfortable.
English saddles cost anywhere from $200-$6000 depending on the quality, the brand, and the intended use of the saddle. For example, an all purpose saddle made in a mass produced facility is going to be much cheaper than a custom dressage saddle.
When putting your saddle on, place the saddle directly on top of your saddle pad and half pad. The front of your saddle should fall just at the withers and sit squarely on your saddle pads. If your saddle pads need to be adjusted, you will notice usually once your saddle is on and in place.
Usually once the saddle is on, I like to pull the fronts of my saddle pads up a bit so the saddle pads are up in the pommel area of the saddle and not pressed down too hard on the withers!
Now that we have the saddle pad, half pad, and saddle resting on the horse’s back, it’s now time to fasten the saddle to our horse!
Step 6: Attach the Girth to the Saddle

The girth is a very important piece of tack that is used to hold the saddle on the horse’s back. Think of it like this: you use a belt to hold your pants up, if you don’t wear a belt, your pants will fall down. The girth has pretty much the same function.
On most girths, there is a stretchy side, and a non-stretchy side. (By stretchy I just mean that there are elastics on the girth) Some girths have 2 stretchy sides and others have no elastic at all, but the most common design features one side with elastics and the other without.
When attaching the girth to the saddle, I like to make sure my girth goes through the nylon loop on my saddle pad to ensure the saddle, girth, and saddle pad all stay together as one piece and nothing shifts, moves, or slips during your ride. Simply stick your girth through this loop before securing it ti your billets!
Typically, if your girth has one stretchy side, you will take the side without the elastics and put it on the right side of your saddle. To do this, lift up your saddle flap to expose the billet straps and buckle the girth to the two outmost billets. (On most English saddles, there are 3 billet straps. I only ever use the two outmost ones. The middle one is sort of a back-up option in case one of your billets breaks or becomes damaged)
Once your girth is attached on the right side, simply walk around your horse to the left side. Reach under your horse and grab the girth and bring it up to the left side of your saddle. This is where you will put the stretchy side of your girth through the saddle pad loop and buckle your girth to the two outmost billet straps on one of the loosest holes.
Sometimes horses can be “Cinchy” or “Girth Sour.” This basically means they don’t like it at all and can act out when their cinch or girth gets tightened. This is why I like to keep my girth relatively loose at first. I prefer to gradually tighten it up during my tack up session instead of doing it up tight in one go. I don’t want to cause my horse any discomfort when getting ready to ride.
Now that your girth is loosely attached, lets move onto step 7!
Step 7: Put On Your Breast Collar (optional)

The reason I list this piece of tack as optional is because not all horses will need this piece of equipment. The breast collar is usually used to help keep your saddle in place by preventing it from sliding back. Sometimes, martingales or tie-downs will be attached to the breast collar as well to help keep the horse’s head down in a collected position.
If you don’t have a breast collar or just don’t want or need to use one, please move onto step 8! If you do have one though and want to know how to properly use it, let me tell you how.
On the breast collar, there is usually a flat, plate-like piece of leather. This part will be resting against the horse’s chest. Usually with English breast collars, the whole breast collar will simply go over the horse’s head. To ensure you have it on properly, check to see if that flat piece on your breast collar is against your horse’s chest, and not sticking out. If it is sticking out, simply take the breast collar off, flip it around, and put it back over your horse’s head and around their neck
Once the breast collar is over your horse’s head and you checked to make sure it went on the correct way, you will take the straps hanging down by the horse’s withers and attach them through the small rings at the front of your saddle.
Once the upper straps are connected, move onto the lower strap. This strap will go in between your horse’s front legs and either go around the girth or snap onto a ring on your girth.
If your breast collar just has a big loop at the end of it and you don’t have the option to snap it onto your girth, you may need to undo your girth and put it through this loop in your breast collar. If this is the case, maybe do step 6 & 7 at the same time so you don’t need to back track to put on your breast collar.
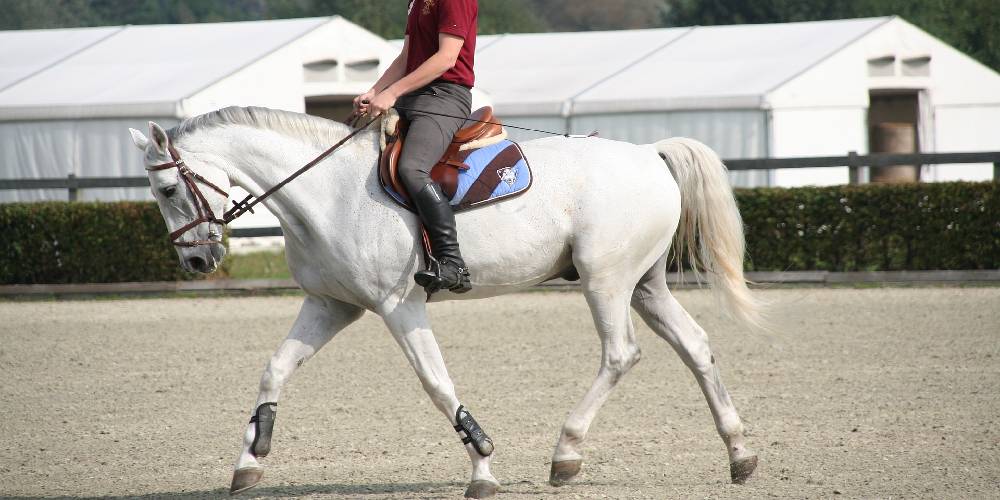
Step 8: Put The Bridle On
When bridling a horse, you first must remove the halter from their head (if your horse is wearing one) so it doesn’t get in the way of bridling.
Once your horse’s head is clear from any other tack, you are going to take your reins and just place them around your horse’s neck in the same position you would put them right before you would get on.
Now that the reins are out of the way, take the noseband from your bridle and hold that and your crown-piece together in your right hand.
Place your left hand flat under the bit and use it to guide the bit into your horse’s mouth. If your horse doesn’t open their mouth, you can use your thumb and stick it up on your horse’s gums above their teeth to help encourage them to open their mouth.
When your horse opens its mouth, gently pull the bridle up so the bit goes into their mouth. At this point, drop the noseband down so its resting on your horse’s nose and put the crown-piece behind the horse’s ears, be sure to gently put one ear through at a time.
Once the bit is in the horse’s mouth and the crown-piece is behind the horse’s ears, find the throat-latch strap and buckle it loosely under the horse’s throat. To make sure it isn’t too tight, I like to take three fingers stacked on top of each other and I should easily be able to fit that between the throat latch strap and the horse’s throat.
After your throat latch strap is securely fastened, take your noseband and stick each side of it underneath the cheek-pieces and/or bit. When buckling the nose band, make sure you can easily fit one-1.5 finger widths underneath. A noseband that is too tight will be very uncomfortable for your horse.
Step 9: Tighten Your Girth & Adjust Your Stirrups
Now that all your tack is on and in place, bump your girth tighter if needed and then walk your horse to your arena, round pen, or wherever you’re planning to ride. Once you’ve walked a bit, tighten it up again if needed. When you are done tightening the girth, you should be able to just squeeze three of your fingers underneath. If you can fit your whole hand or whole arm, you know that your girth still is too loose.
Make sure your stirrups are adjusted to your size, check your girth one last time, and climb aboard!
I hope this guide helped you learn how to properly tack up your horse in English tack!
If you would like to see more articles, please email me your article requests!
If you would like to support me, please feel free to purchase anything through my Amazon links above!