I don’t know about you, but riding in circles all the time or just walking along trails constantly gets really really boring. Because of this, I came up with five different patterns that you can easily set up at home in your arena to make riding a little more interesting. These patterns can also be easily used for:
- Riding Lessons
- Horse Training
- Strengthening
- Walk Exercises
- Rehabilitation
- Just For Fun!
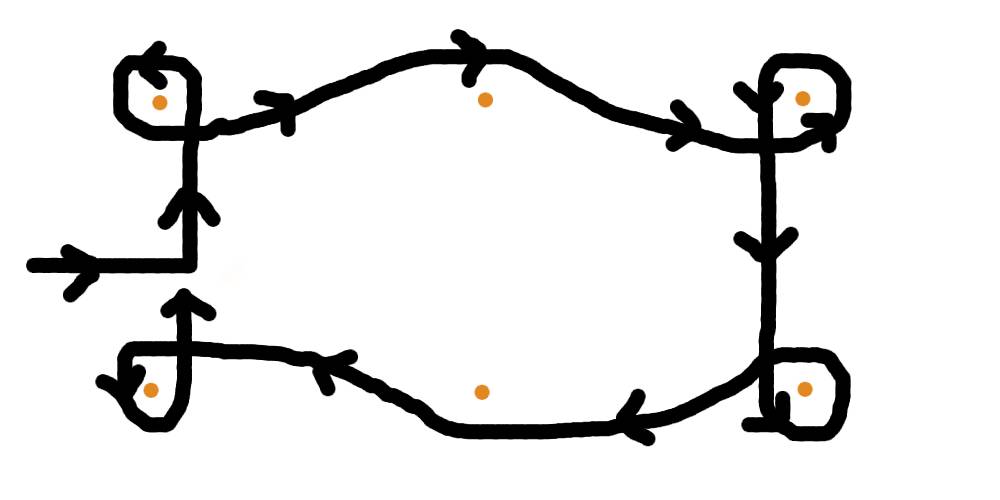
1. Weaving Snake Pattern
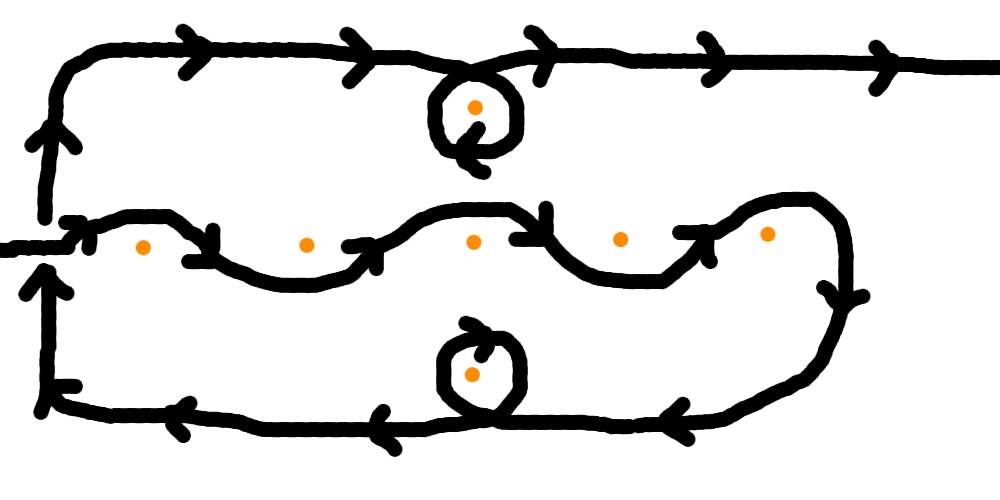
This pattern is one of my favorite patterns to do with my lesson kids. The reason this is one of my favorite patterns to have my students do is because this pattern forces the kids not only to direct the horse around subtle turns, but it also requires them to steer the horse around much sharper turns as well and turn the horse in a circle.
The example patter than I drew above is one that uses 7 cones though sometimes I will only use 6 cones for this pattern.
The first thing the rider will do in this pattern is to weave the horse in and out of the cones set out in front of them. They will ride around these cones in a weaving snake-like pattern. This snake pattern practices subtle turns and the use of the rider’s legs.
Once done weaving between cones, the rider will then steer the horse in a big wide arch towards one of the cones lying on the outside of their weaving line. The rider will then push the horse into a circle around this cone before continuing on with the pattern.
Once done with their first circle, the rider will guide the horse around the line of cones and pass their original starting point. Once past the original starting point, the rider will aim towards the last cone standing and turn a circle around that cone. Once this circle is finished and the rider hasn’t knocked any cones over, the pattern is complete.
2. Zig-Zag Pattern
This pattern is a pretty easy pattern to complete, but unlike most other zig-zag patterns, this pattern has the cones arranged in a different way. Most patterns will have the cones spaced out to make the zig-zag easier for the horse ans the rider. This pattern requires much sharper turns of the horse because of the placement of the cones.
This first step in the pattern is to go around one of the cones closest to the rider. Once around this cone, the rider needs to turn their horse back to the cone directly across the cone they just circled. They need to do this even if it means that they need to almost turn back around to where they came from.
The rider will steer their horse in this pattern until they run out of cones to turn around. You can either end the pattern at th end of the cones, or you can have the rider circle the horse back to complete the pattern going the other direction.
3. Drive-Thru Pattern
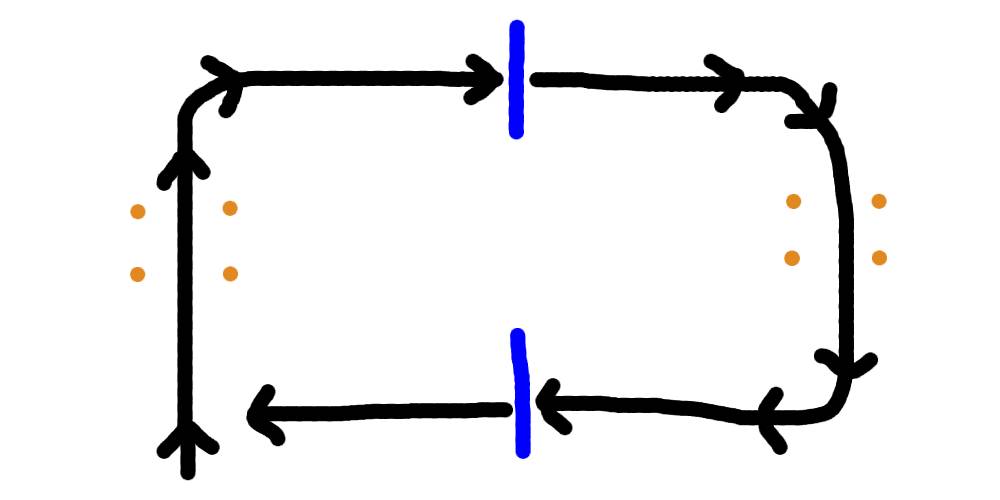
I like this pattern a lot because not only is this pattern good for keeping a horse in a controlled circle, but it also helps the rider to direct the horse through a certain point.
In this pattern, the cones are set up like sort of ‘lanes’ or ‘drive-thrus’ where the rider needs to ride their horse through these specific drive-thrus.
Once the horse and rider are past the first drive thru lane, they will turn towards their next obstacle. I like to have a ground pole on the ground at this point of the pattern so the horse has an obstacle to cover and the rider is forced to keep better control of the horse in order to clear this next obstacle.
Once ver the first ground pole, The rider will turn yet again and pass through another drive thru lane. After passing through this lane, the roder will have ytet another ground pole that the horse needs to clear. Once this circle is complete, you can ride it again and again or you can even switch it up so you go in the opposite direction or you make the course into a figure-8.
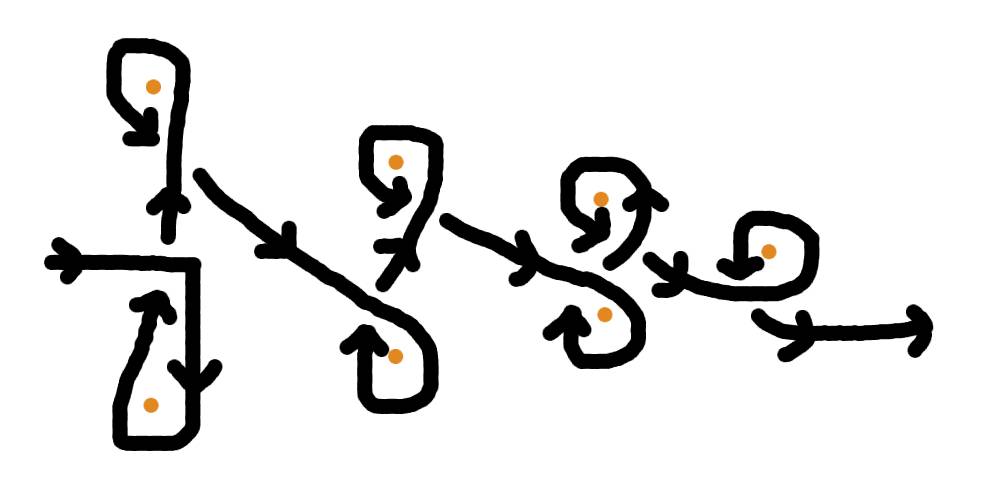
4. 4-Loop Pattern
The 4-loop pattern is a pattern that, in one round, has the horse perform 4 circles or loops.
To complete this pattern, you want to first decide if you want to go right or left. When this is decided, you will then go the direction of your choice and go towards the inside fo the cone to make your first circle.
Once around this first cone and your first circle is made, press your horse around the outside of the next cone before completing a circle again.
This pattern will repeat itself over the remainder of the mini course. I would recommend practicing this pattern going both to the right and to the left.
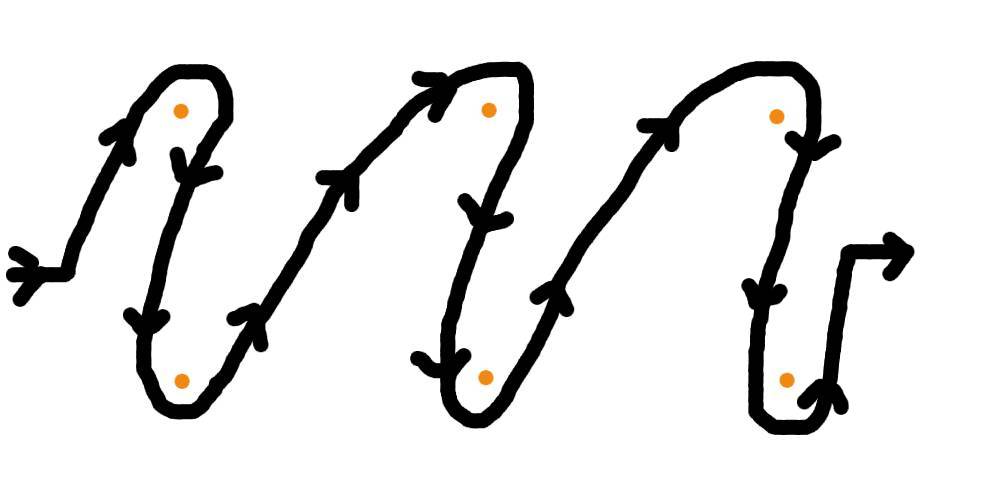
5. Christmans Tree Pattern
I like the Christmas tree pattern for a few reasons. One of the reasons that I like this pattern is the fact that the horse travels in the fun Christmas tree shape. Another reason why I like this pattern is because the turns get harder and harder for the rider as you ride the horse closer and closer towards the tip of the ‘tree.’
Just weaving figure 8’s around each cone will help to improve the horse’s turning, the rider’s steering, and get the rider used to making a variety of turns at any given time.